Week 15, Assignment 5: Antipathy or Admiration – Creating A Response, Final Presentation (5/12-next week)

***ASSIGNMENTS BELOW

FOR THE CRITIQUE NEXT WEEK (graded on LP and oral presentations) 100% of your project grade.
Finalize your project.
Please follow the guidelines below to complete the presentation requirements.
USE THE DOCUMENT THE PROVIDED PROMPTS.
linked below under “TO REVIEW” as the format for your LP and final oral presentation.
All process materials will be presented during the crit from the post for the final project on your Learning Portfolio.
The graphic layout, quality of your images, written content, and detailed documentation are required. MAKE THIS POST YOUR BEST!
-Our special guest Linnea Paskow, who teaches the other section of Drawing Through the Making Center, will take part in the critique to give you professional feedback. Professor Paskow will need to see all the steps of your process.

TO DO:

  1. To prepare for the final project critique, please think about a strong concept, visual readability, scale, color, material, methods, and vocabulary learned from our class (go down to the bottom of the page.) Include your proposal, research, and viewpoint.
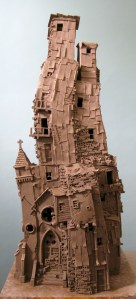
  2. Consider how you want the project presented. Create a professional visual presentation. For example, take several well-lit photos of your final artwork from different angles with a non-distracting background, such as a blank white wall or solid color white surface, which contrasts and compliments your artwork. Zoom in on details. Freestanding 3d work should be staged, just like your clay structure with a blank background.
  3. Create a post for the final project on your Learning Portfolio and upload it to Canvas by WEDNESDAY, MAY 11, at MIDNIGHT, complete with the steps within the project, written reflection, and visual process.
  4. Practice your 5 MINUTE ANTIPATHY or ADMIRATION ORAL PRESENTATION.
    TO REVIEW
    :
    THE PROVIDED PROMPTS for details on preparing for Part 1-the LP post and Part 2-Oral presentation. You can create the LP post for your presentation as a slide show or video. You will share the content within your Learning Portfolio post. Only post jpegs, not pdf links, onto your Learning Portfolio.

TO SHOW DURING YOUR PRESENTATION:
1. Your final physical project to show in person by your side. We will look at them before your presentation.
2. Completed Learning Portfolio post uploaded to Canvas ahead of time. I will share your LP posts on the classroom screen during the presentations.

  Email me if you need anything.

I look forward to seeing your final projects! I know they will be fabulous!

Posted in Assignments, final project | Tagged , | Leave a comment

Week 14, Assignment 5: Antipathy or Admiration – Creating A Response, continued (5/5)

TO DO:
1. As the last step to the Transparent Illusion project, create a Learning Portfolio post. Find the prompts for the post HERE. Link the post to the Canvas assignment by May 5.

1. Continue revising your final project proposal based on my recommendations. If any changes are made to your original ideas, the proposal must be adjusted. The revised version is due May 5. Your early submissions and revisions will allow me the opportunity and time to make responses to your proposals so you can continue your assignment before our next class. We won’t need to spend time reviewing your proposal during our next class. Instead, you can use the time to work further on your projects. Remember: You will lose points if you do not attend class and meet with me one-on-one to review your progress. It is the last working day before the presentation. The project should be your best!

2. Complete at least 1/2 of your final project for homework and make arrangements to work in your Making Center lab of choice. Now that you have decided on your process/medium (laser cut, stickers, clay, drypoint), Please arrange to work in your chosen lab during the total time of our next class.  In other words, if you are creating etchings, you will be working on the press in our classroom or the printshop.  You can work in the Ceramics Shop on your clay project or the set up in the classroom, and in the classroom, on your sticker work-no appointments are needed. If you choose to laser cut, you need to schedule an appointment with the Laser Lab for our class time as soon as possible.
*If you are making stickers, have them completed and submitted in time to have them printed before the final day of class on May 12. Please visit the Design Lab for information on turnaround time.
*If you are working in clay, consider the time needed for the clay to dry it will not be bisque fired

You can review examples of past student final projects (here)

3. Please complete your course evaluations

TO BRING:
1. Sketchbook
2. Your proposal for your reference
3. Your final project in progress 
4. Materials to continue the making process during class
For example-computer, preliminary drawings, plexiglass, clay, printmaking paper, laser cutting surface. Again, let me know what I can provide for you before Wednesday. I will need time to gather supplies.

Posted in Assignments, final project | Tagged | Leave a comment

For Week 13, Assignment 5 – Final Project (4/27)

TO DO :
Transparent Illusion
1. Finalize all: Illustrator document submission on Canvas, printed stickers, printed photos showing stickers on window view for the start of class.

Antipathy or Admiration: Creating a Response
2. Continue revising your final project proposal. Consider the comments provided by your group during our last class and my remarks in Canvas. If any changes are made to your original ideas, the proposal must be adjusted. The revised version is due April 28.
3. Complete at least 30% of your final project for homework. Now that you have decided on your process/medium, Please arrange to work in your chosen medium during our next class. You have two more classes to work on your final project. The final is due for presentation on May 12.

SUPPLIES :
1. Sketchbook
2. Your proposal for your reference.
3. Your final project in progress 
4. Materials to continue the making process during class

Posted in Assignments, Drawing, final project | Tagged , , , | Comments Off on For Week 13, Assignment 5 – Final Project (4/27)

For Week 12, Assignment 4: Transparent Illusion and Final Project (4/21)

Remember to allow enough time to submit, print, place on a window, and photographs.
Five days is a safe time frame between emailing the document and picking up the stickers. The stickers will not be printed over the weekend; send them in today via email, Friday, April 15, at the latest.

Instructions for SETTING UP AND SENDING IN THE STICKERS DOCUMENT  (shown in class)

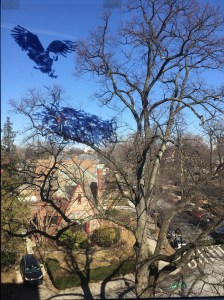
Your goal is to have your printed sticker illustrations placed and integrated into the scenery that goes beyond the window. It is important to have the right scale and lineup of the stickers in relationship to the scenery. Create the images dark enough to show up when placed on your window.
Take photos of the stickers and scenery from different vantage points. Be sure the stickers and scenery are both in focus (not blurry in the background.) Print out the photographs for the final presentation. Then enjoy the final illusion!

***HOMEWORK
TO DO:
1. Complete the formatted Illustrator document 
2. Send the file via email to the Design Lab in time to receive the stickers by Wednesday before class.
3. Place the stickers on the chosen window(s) areas.
4. Take good-quality photos of the setup to show as your final presentation. (The printed stickers and PRINTED photos of them on the window are the final project.) I showed examples of the printed photos in our last class. Please carefully align the stickers and the scene through the window when taking your photos. You want to create a convincing illusion.
Please be sure to use quality photo paper or shiny paper to print out your photos for the presentation.

Homework Assignment #2-Proposal for your final project
1. Write or type (much preferred) a brief proposal using the categories on the
PROVIDED TEMPLATE

Reference: Examples of past student final projects

Overview of the open-ended assignment based on any concept and way of making, create an interpretation that reflects either a positive (Example: my current situation heightens my creative nature) or an adverse reaction (Example: I can’t wait for COVID to be over.)
You can choose to use the laser cutting, printmaking, clay building, or the sticker printer
We will discuss the proposals for the final project during the second 1/2 of the next class.
Make your appointments for the Laser Lab to use during class time on 4/28. If you are using printmaking or clay building, let me know so I can arrange usage during class. -See my latest ANNOUNCEMENT for the latest details.

TO BRING:
1. drawings in your sketchbook
2. your acetate prototypes
3. final illustrator drawings/documents (the files will be submitted to me on Canvas BY the start of class)
4. t
he sheet of printed stickers (remove them from the window and stick them back on the original sheet)
5. PHOTOS are a key part of the final outcome of the stickers on windows

You will need to bring your computer – for showing documentation during the crit NOT A SUBSTITUTE FOR PHOTOGRAPHS THAT ARE PRINTED OUT. PRINTING IS REQUIRED and in case we have time for posting on your Learning Portfolio during class. **All items you bring for the crit will be photographed and shown in your LP post.

6. Your typed proposal. You will submit it to Canvas before the start of class.

I look forward to seeing the final results!

Posted in Assignments, Graphtec Printing, Prototype | Tagged , , , | Comments Off on For Week 12, Assignment 4: Transparent Illusion and Final Project (4/21)

For Week 11, Assignment 4: Transparent Illusion – stickers (4/14)

TO DO :
Ask yourself these questions:
-How would you create the illusion that images placed on a window are part of the scenery behind them?
-What subject matter would you create?
-How would you use your way of drawing lines and mark-making? How heavy and dark do your lines need to be to show up? Can you fill in black areas to create impact?
-What dictates the subject matter? (You can draw anything you choose as long as there is a relationship to what you see through the window.)
-How would you determine the scale of the transparent drawings? (The prototypes will assist you) Please note, as indicated below, that the sticker sheets are 28″ long x 1″ high at minimum. If you choose a larger height, it will cost you more.


PLEASE NOTE (Enlarge the video, so it plays from the beginning)

STEPS to FOLLOW (shown in the video)
1. First – choose any window(s) of any size with any view you like best.
2. Next – finalize five black and white drawings.
Note: ALL  FIVE IMAGES will be translated into transparent stickers. They can be created by hand or digitally.
3. Then – prototype the drawings by sketching them in a black sharpie marker on top
of acetate or other transparent paper and placing the pages onto one or more windows.
Create the drawings in different sizes to play around with scale.
4. Lastly – Take photos of the window(s) with the prototypes in place.
EXAMPLES OF THE PROCESS AND STUDENT OUTCOMES

You will be given time in class to make revisions to your drawings and finalize your images in Illustrator. Please be sure to have a photo of the window so that I can review all of the elements you are putting together to make your final images.

TO BRING:
-Your five black and white drawings to show in person
-A photo of the prototypes over your chosen window. 
(You can bring the prototypes in as well.)
-Your  computer with Adobe Illustrator
The cost is $2.00 for a 28″ x 1″ sheet. Larger sizes will cost more. Several drawings can fit on one strip. You can also share your sticker space with another student.

I look forward to seeing your drawings, prototypes, and photos!

You can always ask me questions via email for clarity. 

Posted in Drawing, Graphtec Printing, Prototype | Tagged , , | Comments Off on For Week 11, Assignment 4: Transparent Illusion – stickers (4/14)

For Week 10, Assignment 3: Built Metropolis Final Presentation on your LP- 4/7

For the critique, please know the name, location, and history of your building reference. Remember we will review your structure on all sides (360 degrees).
Bring all parts of the project for the FINAL PRESENTATION
Our special guest Aviva Shulem will take part in the critique to give you professional feedback. Miss Shulem will need to see all the steps of your process.

TO DO:
1. To prepare for the critique study the CLAY TERMS and HAND BUILDING TECHNIQUES on the Vocabulary page (LINK) 
3. Prepare your LP post ahead of time to use during the presentation. Please use the prompts and examples. Share it on Canvas before class.
2. Obtain your bisque ware from the shelves in the Ceramics Shop firing room on Thursday morning, April 7, before class. Process-Your work will be taken from the bisque shelf on Tuesday, placed into the kiln for firing then taken out and put on a shelf in the firing room. Allow enough time to go to the firing room on Thursday, pick up your work and get to class by 12:10.

TO BRING:
1. Your finalized and bisque fired structure
2. Have your LP post shared (presentation slides of sorts) ready for presenting.


Posted in Clay building | Tagged , , | Leave a comment

For Week 9, Assignment 3: Built Metropolis – continued 3/31 (MISSING WORK IS DUE 3/29)

We will meet in our classroom. At the start of class, I will show examples by contemporary professional artists for inspiration.

HOMEWORK:
TO DO:
1. You have the option to work on your clay project in the wet lab during open working hours. To do so, you will have to obtain the clay tools from me ahead of time.

2. If applicable, submit all missing/late projects by the Tuesday, 3/29 for grading purposes. (Upload images of your drypoint prints. Share the link to your LP post.)

REFERENCE:
Clay terms and hand-building techniques

SUPPLIES:
1. Sketchbook with drawings of your building designs
2. Photos of your chosen structure from different angles to use as references.
3. The start of your project

4. Leftover clay

Posted in Assignments, Clay building | Tagged , , | Leave a comment

For Week 8, Assignment 3: Built Metropolis 3/24

Please read this post all the way to the bottom.
We will meet in the classroom,
drop off our things, and travel to the Ceramic & Wet Shop. 

ASSIGNMENT DESCRIPTION:
The technique of raising and carving sculpted clay above and into the background plane and form is the driving force for creating structures influenced by Manhattan architecture.
Take a walking tour throughout the East Village or other chosen neighborhood. Find two architectural structures and photograph them from multiple sides. Create sketches and take research notes in your sketchbooks.  Each person will create one small clay building structure influenced by chosen architecture over two weeks. Your structures need not duplicate their reference. The making process will incorporate hand-building techniques. During the final presentation, they will all be placed together to form our own metropolis.
The final size can be from 5″ –  7″ in height and width.
The project due date is April 7.

EXAMPLES OF PREVIOUS PROJECTS
 
Here you will find all the steps for the project-photo, sketches, research, final projects. 

LINK TO THE VIRTUAL WALKING TOUR
From this link, you can base your two choices of architectural styles. It shows you a range of structures in the Village and their locations, architectural styles, and a brief history. FYI-In the middle of the linked page, you may be interested in finding the New School with a brief history.

LINK TO THE MAP OF GREENWICH VILLAGE FOR YOU TO USE FOR YOUR NEARBY ARCHITECTURAL CHOICES
The Village is in the neighborhood of the school and therefore convenient.
If you would like to choose another location in NYC or its boroughs, feel free.

HOMEWORK:
TO DO:
1. Please upload photos of the prints you took during the crit in class to count towards submission for the final project HERE.

2. Complete your Learning Portfolio post for the Myths and Legends project by Thursday, March 24, at the latestYou have to provide the link to the post on Canvas. Please use the prompts at the top of the page HERE for what to write in your post.
There are links to an example of a post (under the prompts) that is a good model for the Myths and Legends Learning Portfolio reflection.

3.  Take five photographs of each of your two architectural structures. Take them in person (not from the web), showing visible sides of each building. You need to have multiple views to create a 3d object. You do not need to print out the photos. You can show them on your phone. In the end, we will choose one of the two architecture references which best suits the project and its time constraints.

4. Two or more concept sketches in your sketchbook in pen or pencil of your building designs based on your two chosen structures. Please consider the design on all sides, function, and the clay material you will use. The final designs don’t have to be exactly like your reference.

5. Research (brief notes in your sketchbook) on the architectural style and history of your two building choices.
(Photos, sketches, and research are due. Please upload them to Canvas.)

TO BRING:
1. Sketchbook
2. Five Photos of each structure to use as references
3.
$3.00 to purchase clay. Tools will be supplied.

Posted in Assignments, Clay building | Tagged , , , | Leave a comment

Week 7, Assignment 2: Myths and Legends Final Presentation (3/10)

Please read the post all the way to the bottom

TO DO:
1. Ceramics orientation:
Online first, then in person: All students must complete the canvas element of theCeramics Tier 1 Orientation. Students may not fire their work or enter the shops without this online orientation.

2. Design Lab orientation:
You can sign up using this form.

3. Be sure the photos of your sketches and etching plates are taken in good lighting such as next to a window during the day. You will submit photos of the final project on Canvas. You can take photos of the prints left to dry during class.

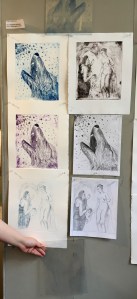
4. Prepare for a presentation and critique of the printmaking assignment. We will need to see all of the etching prints you created (both good and bad) to review the changes and improvements. Be prepared to discuss your making process and concepts for your myth and legend images. Make sure you are familiar with the titles and stories you chose to interpret.

5. Study the INTAGLIO TERMS, MATERIALS AND PRINTING TECHNIQUES on the Vocabulary page to prepare for the presentation.

TO BRING:
Bring all process drawings, printing plates, and final prints (I will bring in the prints you left drying in the Printmaking Shop)

Posted in Assignments, Drypoint, Printmaking, Vocabulary | Tagged , , | Leave a comment

For Week 6, Assignment 2: Myths and Legends-Printing the Story (Part 2) Native American Legends (3/3)

We will meet in the classroomAt the start of class, we will review the prints you created last week and make comments and suggestions. No need to collect the prints from the Printmaking Studio yourselves.  I will bring your prints to class with me. Be sure to bring back the plexi plates you etched into and printed from last week to include in the mini-crit. Afterward, you will continue with the second part of your project. YOU HAVE TO BRING BACK THE ETCHING NEEDLES YOU SIGNED OUT.

TO DO :
1. COMPLETE A TWO PAGED SHORT READING on Seven of the Most Popular Legends attached (here.)  Please note this is not the same reading you completed for last week. This is an additional reading to prepare for this coming Thursday.

2. Based on your choice from this week’s reading, create ONE interpretative drawing on 6×8″ drawing paper. No need to make two drawings. (Now that you are familiar with the printmaking process, you can better judge the outcome.) The image will serve as a tracing template for your printing process.
Please put time and effort into the drawing to reflect a successful outcome. Once the drawing is complete, put it on tracing paper or scan and print it in reverse.
Upload an image of it onto Canvas.

3. Work on the etching plate you printed from during our last class. If you took the etching needle home, work on the engraving you started in class. If you need to wash it off, use soap and water.
Don’t create a NEW etching plate until you come to class on Thursday.

TO BRING:
1. THE ETCHING NEEDLES YOU TOOK HOME HAVE TO BE RETURNED
2. You can purchase one large sheet of BFK Rives printmaking paper and divide it into 4 (buy that specific brand as it works best for the type of ink we use)
I will provide the etching plates again as well. No need to buy your own. (We all need to have the same thickness of the plate to fit through the etching press)

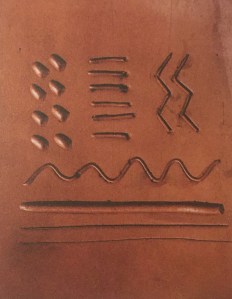
Materials we use in class: Akua printing plate, Akua Intaglio Inks, BFK Rives printmaking paper, diamond point etching needle, twisted etching needle, roulette

REFERENCES:
Class Lectures
Student References
Vocabulary

Please email me if you have any questions about preparing for class. I want to be sure everything is clear.

Posted in Drawing, Drypoint, Printmaking | Tagged , | Leave a comment